Notes => Blog
Prerequisites
Here we use joplin as the note-taking tool and hexo as the blog for illustration. However, these two can be replaced, for example, the source of the notes can be replaced with obsidian, the output blog can be replaced with hugo.
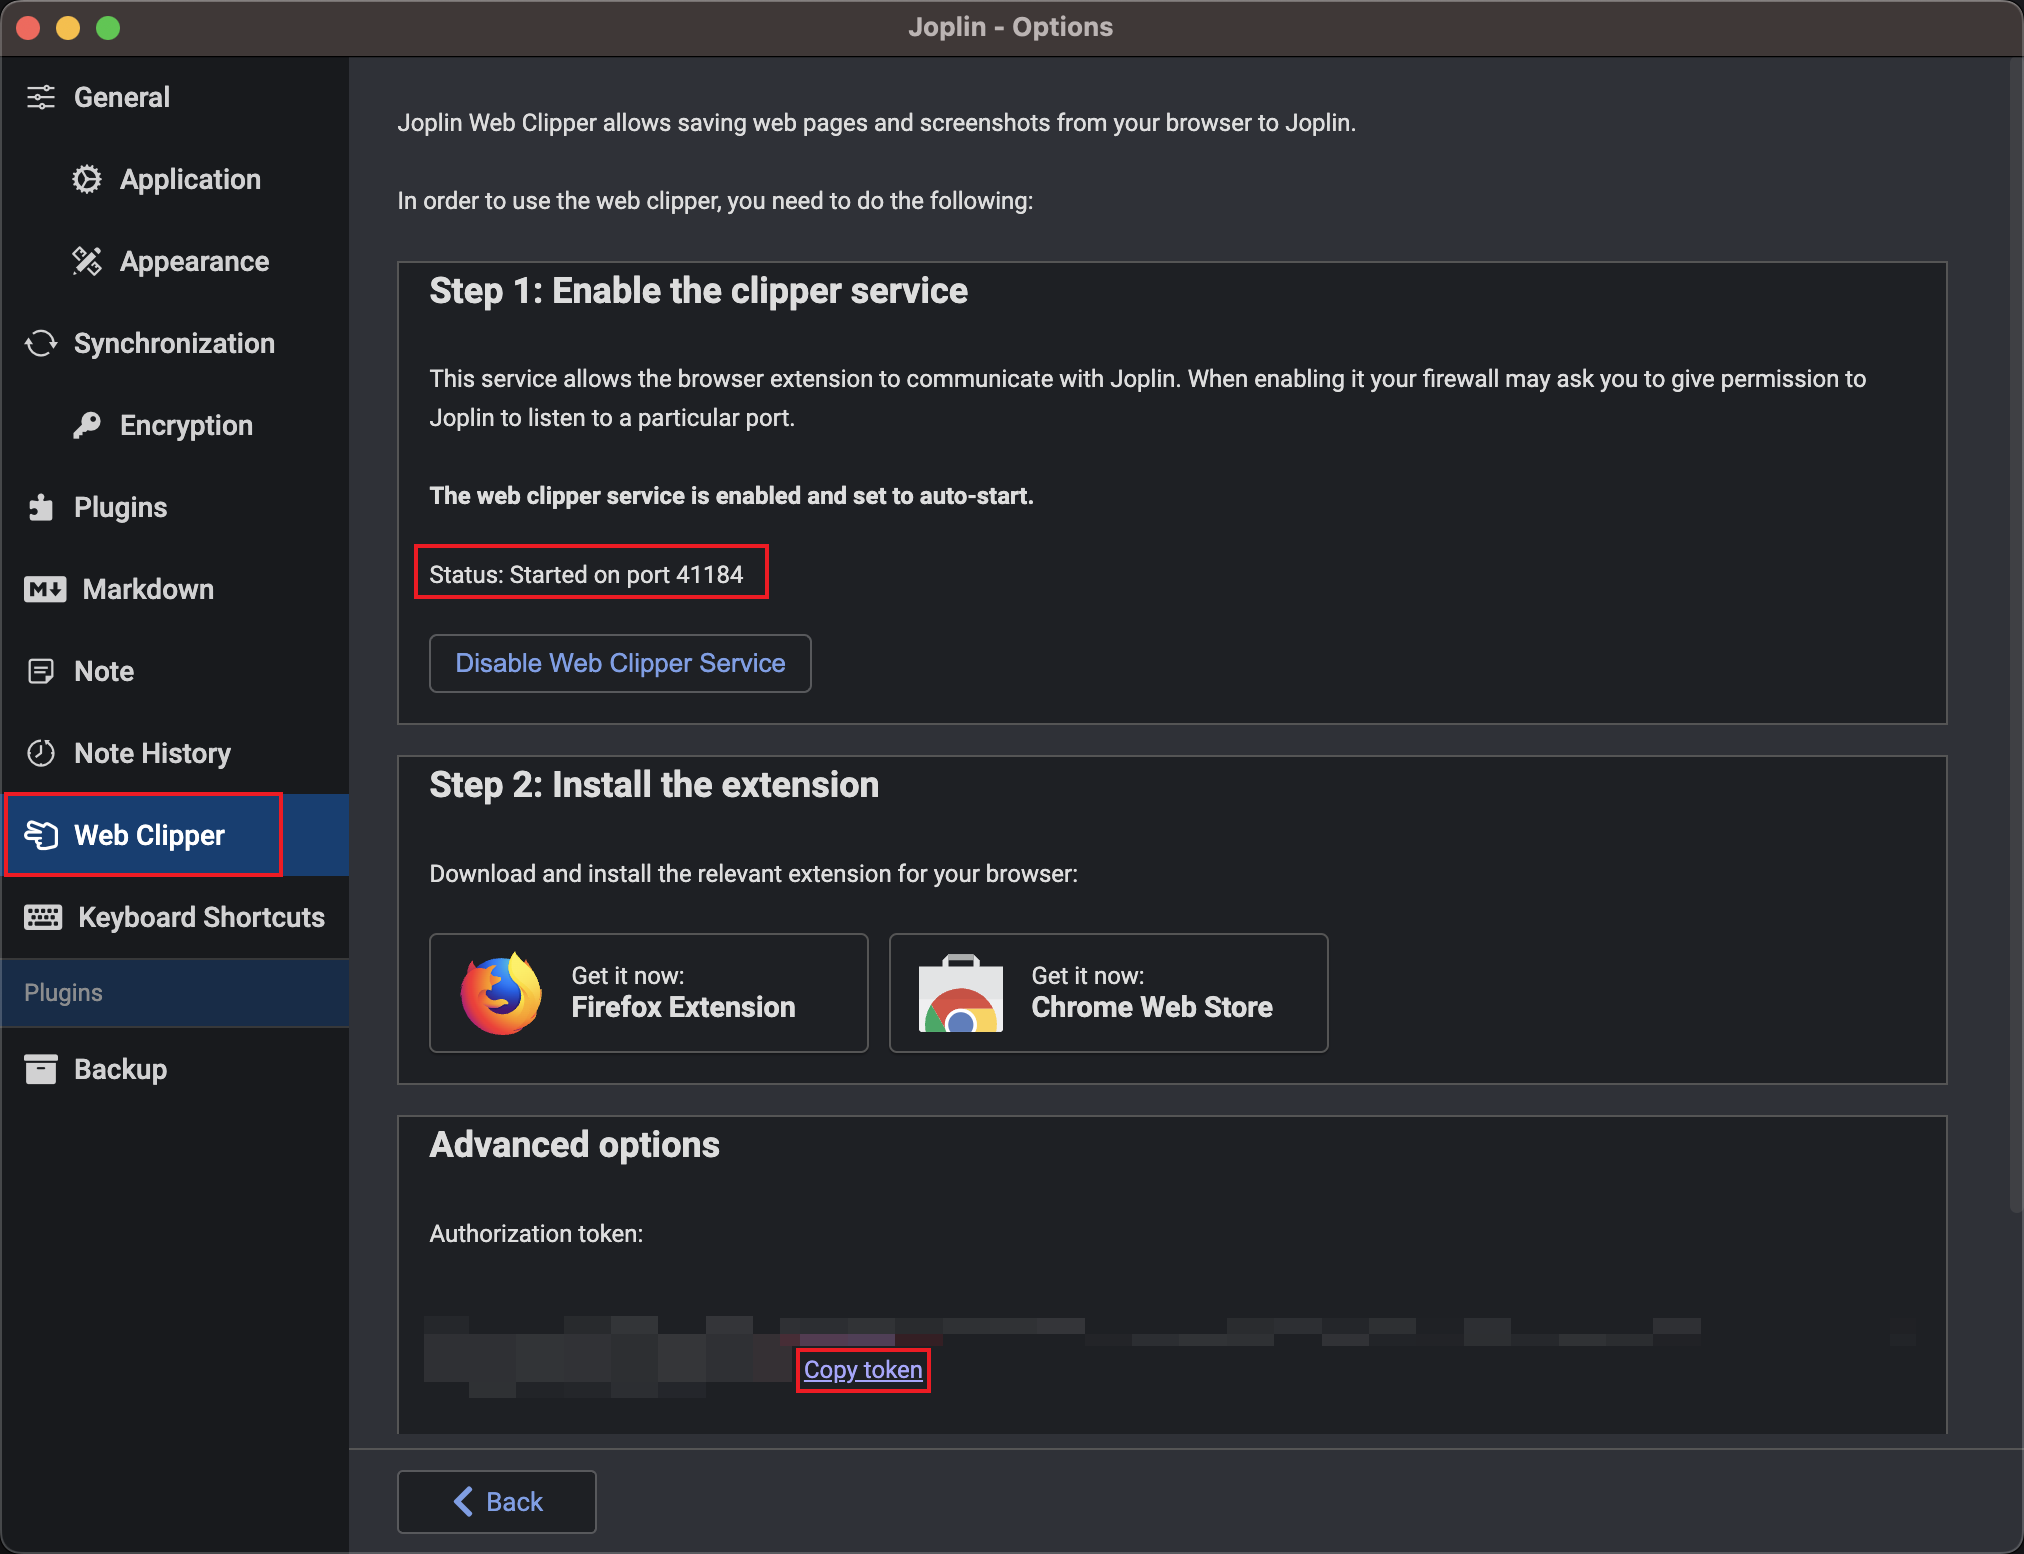
- First, make sure that joplin has turned on the web clipper.
- Next, you need a hexo project. If you already have one, please refer to Connect joplin to an existing hexo blog. Otherwise, continue to the next step.
Creating a hexo blog from scratch
If you don't have a hexo blog, you can use the template to create one to reduce the configuration.
- Create a new project on github using the template project joplin-hexo-demo, operation path Use this template > Create a new repository. If you don't have a GitHub account, please register one.
- Clone your project locally using git in the command line
git clone https://github.com/<username>/<repo>.git - Modify the
baseUrlandtokenin the mark-magic.config.yaml configuration file to the values in joplin settings - Add a
blogtag in joplin to the notes you want to publish - Run the command
npx mark-magic && npx hexo server, and open http://localhost:4000/joplin-hexo-demo/ to see your notes.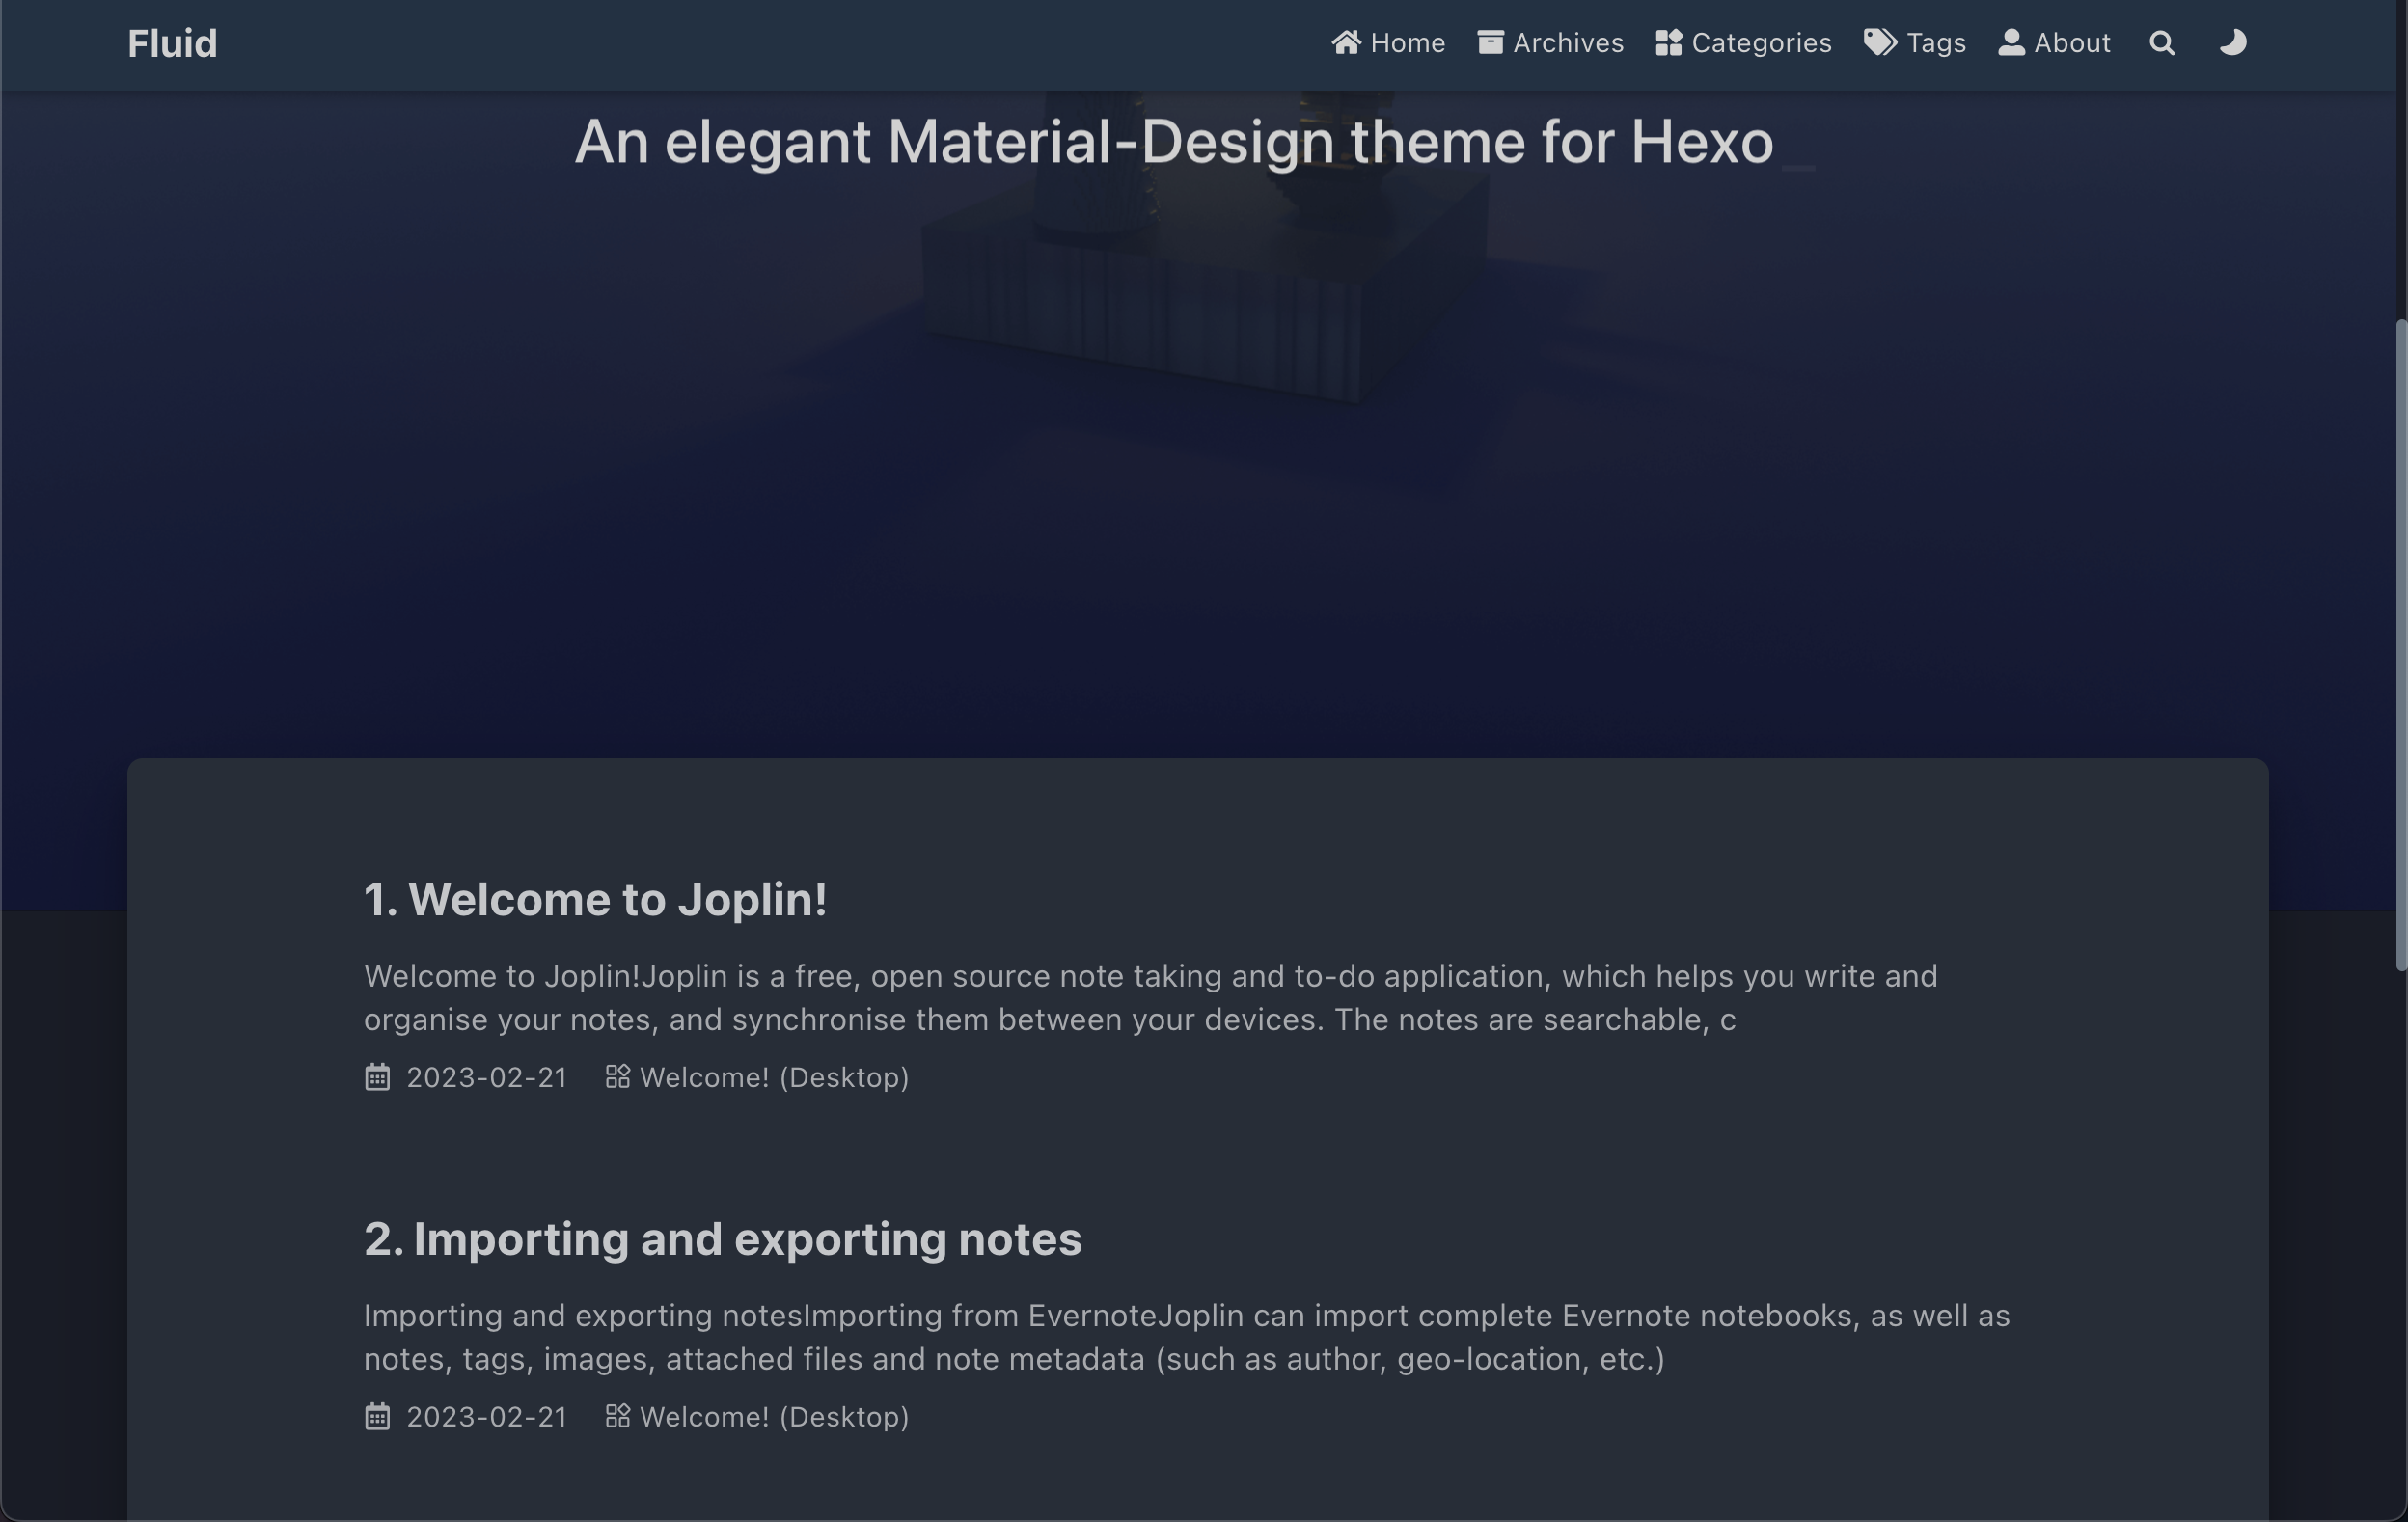
- Now modify the value of
rootin the _config.yml configuration file to the name of github<repo>you cloned - Under Pages in the settings of your GitHub repository, select GitHub Actions in Build and deployment > Source.
- Finally run
npm run committo push all the note content to be published.
Wait for GitHub Actions to complete, and you can check the progress at https://github.com/<username>/<repo>/actions.
When everything is done, you should be able to see the site deployed at https://<username>.github.io/<repo>/ or https://<custom-domain>/, depending on the settings.
The example project can be found at https://github.com/mark-magic/joplin-hexo-demo.
Connect joplin to an existing hexo blog
Install dependencies
npm i -D @mark-magic/cli @mark-magic/plugin-joplin @mark-magic/plugin-hexoAdd config
mark-magic.config.yamlyaml# mark-magic.config.yaml tasks: - name: blog input: name: '@mark-magic/plugin-joplin' # Input plugin, reading data from joplin notes config: baseUrl: 'http://localhost:27583' # Address of the joplin web clipper service, generally http://localhost:41184, here the development http://localhost:27583 is demonstrated token: '5bcfa49330788dd68efea27a0a133d2df24df68c3fd78731eaa9914ef34811a34a782233025ed8a651677ec303de6a04e54b57a27d48898ff043fd812d8e0b31' # Token of the joplin web clipper service tag: blog # Filter notes by tag output: name: '@mark-magic/plugin-hexo' # Output plugin, generating files needed for hexo config: path: './' # Root directory of the hexo project base: /joplin-hexo-demo/ # baseUrl for deployment, default to deploy at the root path of the domain, should match the root configuration in hexo _config.ymlModify the hexo configuration
_config.yml, if it containsyamlpermalink: /p/:abbrlink/Read notes from joplin to generate files needed for hexo blog
shnpx mark-magic # This will empty the source/_posts and source/resources directories, please backup any files
After completion, you can see the generated files in the source/_posts and source/resources directories. Now you can continue to build and publish with hexo.